Kissena Forum Archive

Bicycle Tech/Gear Discussion Thread

8105 comments · 108281 views
About to head off to plainfield, but here I am checking in on Kissena.

Forgot about Zipp.  I think Zipp used to have more carbon road bars, but they've reduced their carbon offerings to two, both at 70mm reach.  For a while, 3T had a relatively deep selection of carbon offerings, but they've drastically reduced their handlebar lineup in general.  I think FSA also used to have more carbon offerings.  

HEre's the Zipp page

https://www.sram.com/en/zipp/models/hb-dbsc-sl88-a1

On a whim, I checked Bontrager, as the bigs offer a full suite of components these days.  Bontrager has an aero carbon road bar with 93mm of reach.  Surprised.  Also, super-short drop, 123mm.  (as a contrast, the bars I've been using, FSA Energy, are listed as 80mm reach, 150mm drop.

https://www.trekbikes.com/us/en_US/equipment/cycling-components/bike-handlebars/road-bike-handlebars/bontrager-xxx-aero-handlebar/p/11289/



Cheers JP!
I succumbed to industry pressure and opted to set my road wheels up tubeless. I struggled for a while to get the tire onto the wheel even using soapy water and then learned the hard way that what I thought was tubeless tape, was not actually tubeless tape *le sigh*.

I'm going to retape them later today, but the thought of fighting the tires off/back on is discouraging. Does anyone have any tips/tricks to get the wheel onto the rim easier? (I'm using 25mm GP500TL's on a roval hooked rim)
I succumbed to industry pressure and opted to set my road wheels up tubeless. I struggled for a while to get the tire onto the wheel even using soapy water and then learned the hard way that what I thought was tubeless tape, was not actually tubeless tape *le sigh*.

I'm going to retape them later today, but the thought of fighting the tires off/back on is discouraging. Does anyone have any tips/tricks to get the wheel onto the rim easier? (I'm using 25mm GP500TL's on a roval hooked rim)
So frustrating.  I even had tubeless tape on an old rim and had the air not hold.  I could have bought new tape, but I decided the rim was pretty close to gone, so I replaced that first.  And I haven't gone back to trying tubeless again.

But, to your question, yes, there are a few solutions.  The GP 5000 TL is notorious for being tight.

*loosen the tubeless valve so the tire bead can get under it while installing.

*work towards the valve.

* make sure the bead(s) are sitting deep in the middle of the "well", the deeper channel in the middle of the cavity.  Periodically pinch the beads together to make sure the beads are there.  

*every time it gets tight, go back to pinching the tire beads together to let them settle.

*roll little sections of bead over the rim wall with your palms.

*if all else fails, get a tire jack.

Kool Stop for home--http://www.koolstop.com/images/Accessories/KS-TBJ IMAGE.jpg

VAR for the saddle bag--https://www.melpintoimports.com/catalog/popup_image.php?pID=495&osCsid=1e83ed25a50108db8a5ba0a717e6cf4a


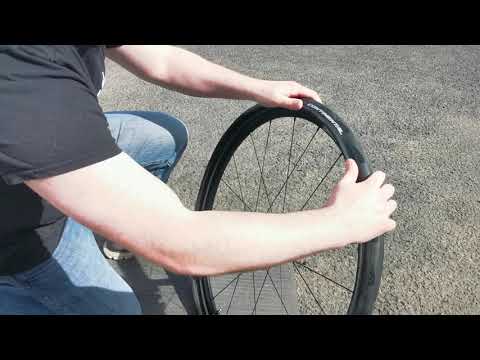
Because Conti's are so notorious, there are several YouTube videos.  Here's a decent one

https://www.youtube.com/watch?v=tuFPjr8wXhA
Thanks @mugwump. I was doing a few of those but definitely not all of them. Will report back on on how smooth take 2 goes
I'm going to retape them later today, but the thought of fighting the tires off/back on is discouraging. Does anyone have any tips/tricks to get the wheel onto the rim easier? (I'm using 25mm GP500TL's on a roval hooked rim)
it's easier the next time around.

https://us.challengetires.com/shop/products/smart-bead-seating-tool/55169
Matt
the 5000 TR's are apparently slightly easier 
I sometimes use one of those tire jacks --

The big "trick" is getting the bead in the middle cavity of the rim. Pushing or pulling the tire towards the last little bit (much like you would a tubular) helps a ton too. 

I have seen tons of advice about working towards the valve. I have never liked that, as the valve is one extra thing you have to deal with for the hardest moment. So (again, much like a tubular) I start at the valve and finish away from it. 

Usually, I wont install sealant until after it is all seated in -- but sometimes you need sealant to pop it all in place.
@Matt Budofsky I struggled to get my standard GP5000s on my new wheels.  It took a solid week of trying.  I ended up leaving them in the sun for a few hours to soften up.  That plus a tire jack worked wonders.
@Mark Taylor I wanted those but the timeline to get them was a bit longer than I was willing to wait.

Hopefully all of the above can help spare my thumbs (gave myself a very nice blister)

Tubeless to me is very similar to disk brakes. Very hard to avoid in the long run, and a huge PITA to use & manage.

Absolutely not a PITA , all 4 of my bikes are set up tubeless , game changer for a commuter , 
Continental tires are the issue , not tubeless set up  
Agree with Mark, generally, lately, find tubeless easier and honestly less flats than tubes. Specially for low pressure gravel cyclocross situations.
second time is the charm! Mounting the tire was much easier the second time around. I underestimated how hard I needed to push the valve in to get it to seal but got there eventually. 

Picked up another blister from rolling the tire over *le sigh* but hopefully this is the last time I need to do this for a good long while. Next time i guess I’ll use gloves? Sounds like a future Matt problem to deal with
To pile on the tubeless discussion, I just set up Panaracer GK SK+ on my 3T Exploro (Fulcrum 900 wheels) with the Muc Off kit. Struggled initially to set the bead when I tried to use a floor pump and didn't try to seat the bead partially using a tire lever.

When I instead used an electric air compressor (plugged into car cig lighter) and used a tire lever to seat the bead around partially, it was easy. The kit has you put the sealant through the valve stem which is pretty clean, I can't imagine trying to pour the sealant in directly into the tire between the rim and tire, I'd get the sealant all over the place.

The tape and sealant held up. I rode once around the block and let the bike sit overnight. Only had to add 1-2 PSI the next day.
I’ll be replacing my Cervelo this week…

https://reddit.com/r/interestingasfuck/comments/vky11o/technically_a_two_wheel_bicycle_made_from_1_05_05/
But... Why...?
Tour de Future
https://youtu.be/PM8b7nevd4w
https://www.youtube.com/watch?v=juGiU45tEAc


I’ve been summoned to my girlfriend’s parents’ place for July 4. Her dad bikes and told me to bring mine - bit the bullet and got myself a Scicon Aero bag for the flight. 

https://titaniumgeek.com/scicon-aerocomfort-road-3-0-review-alpe-dhuez-trip/

Excited to try it out, but I admit I’m nervous - never flown with my bike before, but I worked at an airline for years and called in a favor - they’ll make sure the bag doesn’t get tossed around. 

If any of you need/want to use it in the future, feel free to DM me on slack. 
I have the Scion aerocomfort. Works well.offers good protection.  Never had bike damage over several trips 
Out of curiosity, has anyone tried the Ceramic Speed oversized pulleys? They were pitching them to me at Piermont today, and I almost bit the bullet - but figured I’d give myself some time to do research before dropping $600 on them. 
I haven't.

But I've done a fair amount of research into ceramic bearings in the past.

If you're already spending for the Pinarello Dogma F Awesome with ENVE or Zipp wheels, I think it's an ok investment.

If you haven't optimized everything else first, I don't think it is.

There are plenty of ways to get more speed for your dollar.  Optimizing tire pressure. Good race tires. Latex tubes. Racing/riding in a skin suit.  Deep dish aero wheels.  In that order.

Ceramic bearings at the pulley are fairly small gains.  And the oversized aftermarket pulleys usually come at the cost of a bit less shifting precision.  I'd sooner recommend any number of other brands ceramic bearing pulleys--like Tacx (if they can still be found), Enduro, several others--that you can swap in for what you already have.  They'll get you very close and for $50-100 for the set.  And the Zipp aero handlebars, which I think are around $400 these days, would probably net you a bigger savings than the CeramicSpeed pulley setup.
@mugwump you left off the number 1 advantage; get lower. Find a way through stretching or fit or a combo of the two to lower your head/torso
Jules said:
@mugwump you left off the number 1 advantage; get lower. Find a way through stretching or fit or a combo of the two to lower your head/torso
Great point.  

Not sure if stretching is the answer; I'd suggest core strength helps.  

For me at least, a stronger core makes it easier to get low in front, meaning it takes longer for my back to feel achy when I'm in the drops or when I've got my elbows bent on the hoods.  I've noticed that when my back is stronger/more flexible, healthier, I get on the bike, grab the hoods, and the stem seems shorter relative to the front hub, which I take to mean that I'm pivoting closer to my hips, or that my back is more flexible the whole way from my hips to my neck.  
Just switched to new S-Works shoes.  Probably should have replaced them two years ago.  

One of the reasons I hate changing shoes is cleat placement.  Getting the cleat position right on the new shoe is always difficult.  During the Tour, I saw an amazing jig a WorldTour mechanic has--machined steel or aluminum twin I-beam with threads cut for pedals and a way to set limits in front of the toe and behind the heel of the shoe.  And it made me wonder why bike shops that cater to active enthusiast cyclists willing to drop over $200 for a pair of shoes don't have some kind of cleat adjustment jig.

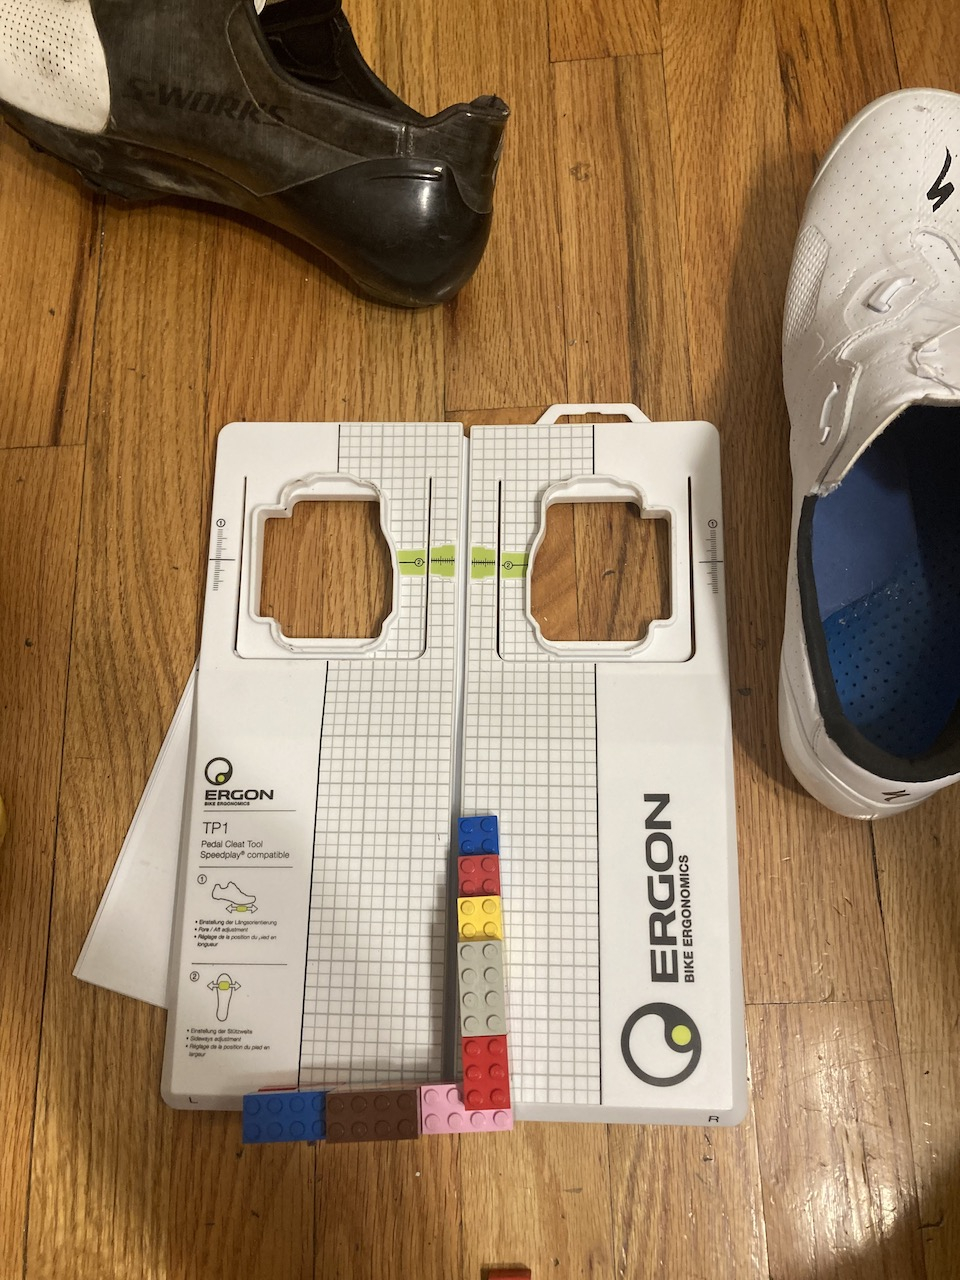
I went online and found that Ergon has a plastic jig called the TP1.  They make it for a number of cleats.


https://ergonbike.shop/products/ergon-tp1?variant=1000641688

It can do fore-aft and lateral adjustments.  IT would be better if there was a second piece that could slide against the heel, but for the price--I paid $30, including shipping--it was easy enough to fabricate that second piece.  

Just used it because my earlier cleat setting effort using a carpenter's square was off by a bit.  

Happy to loan the jig to other Speedplay users.  Lego pieces are my son's.  
Very cool , the shimano one is out of stock😢
FWIW, I got mine from the web retailer Wheel and Sprocket.  
https://smile.amazon.com/Ergon-TP1-Shimano-Cleat-Tool/dp/B0039TJYO2/ref=sr_1_1?keywords=ergon+cleat+tool&qid=1658880410&sprefix=ergon+cle,aps,59&sr=8-1

August to September ETA haha  :D

I remember I bought this, according to amazon in 2014 -- no idea where it is today :(
That's pretty cool!  When you cleat adjustment, are you talking about minor tweaks or a swap to the same position as before?  

For the latter, there was a hack on GCN with using craft foam and making an imprint of the shoe, drilling out holesfor the screws, the using the foam as a jig to replace the  cleats. I'll see if I can find the video.  I suppose it might  not  work with new shoes of a different model, just same shoes with new cleats.